

Introduction :-
Does the default light hurt your eyes? Not able to use the iPhone properly because of visual impairment? Do you want to know how to invert the colors of a photograph on an iPhone ? You have found the perfect place because this article will cover this subject in great detail.
What is inverting a picture ?
This entails adjusting the screen’s color to one that is easier to view for those who have visual problems.
It can also be used if an individual is having prolonged difficulty seeing the light color theme.
For example, if the color is light, it will invert it to dark.
Inverted colors are also beneficial for those who are color blind.
How to invert colors on iPhone ?
Steps to invert the colors of photos on the iPhone :
Step 1 : Launch “Settings”.
Step 2 : Tap “Accessibility”.
Step 3 : Pick “Display and Text Size”.
Step 4 : “Smart Invert” and “Classic Invert” are the two options that you have.
Choose between the options, as per your own choice.
Do you want to know what “smart invert” and “classic invert” ?
Smart invert can be used when you want to only invert the UI.
Be rest assured that nothing will change.
Classic invert should be used when you want to invert everything on the display.

In the above image, you can see the UI is inverted but the photos remain the same.
To use Smart Invert, you will need an iOS version above 11.
What if you want to just invert one picture ?
And not the UI ?
Read on to find out more in detail.
How to invert photos on the iPhone ?
The help of a third party application will be required to inverse the colors of an image on an iPhone. It is not possible to invert colors from the iPhone editing app. Third party applications are needed to invert colors.
Apps which can be used to invert colors are the following :-
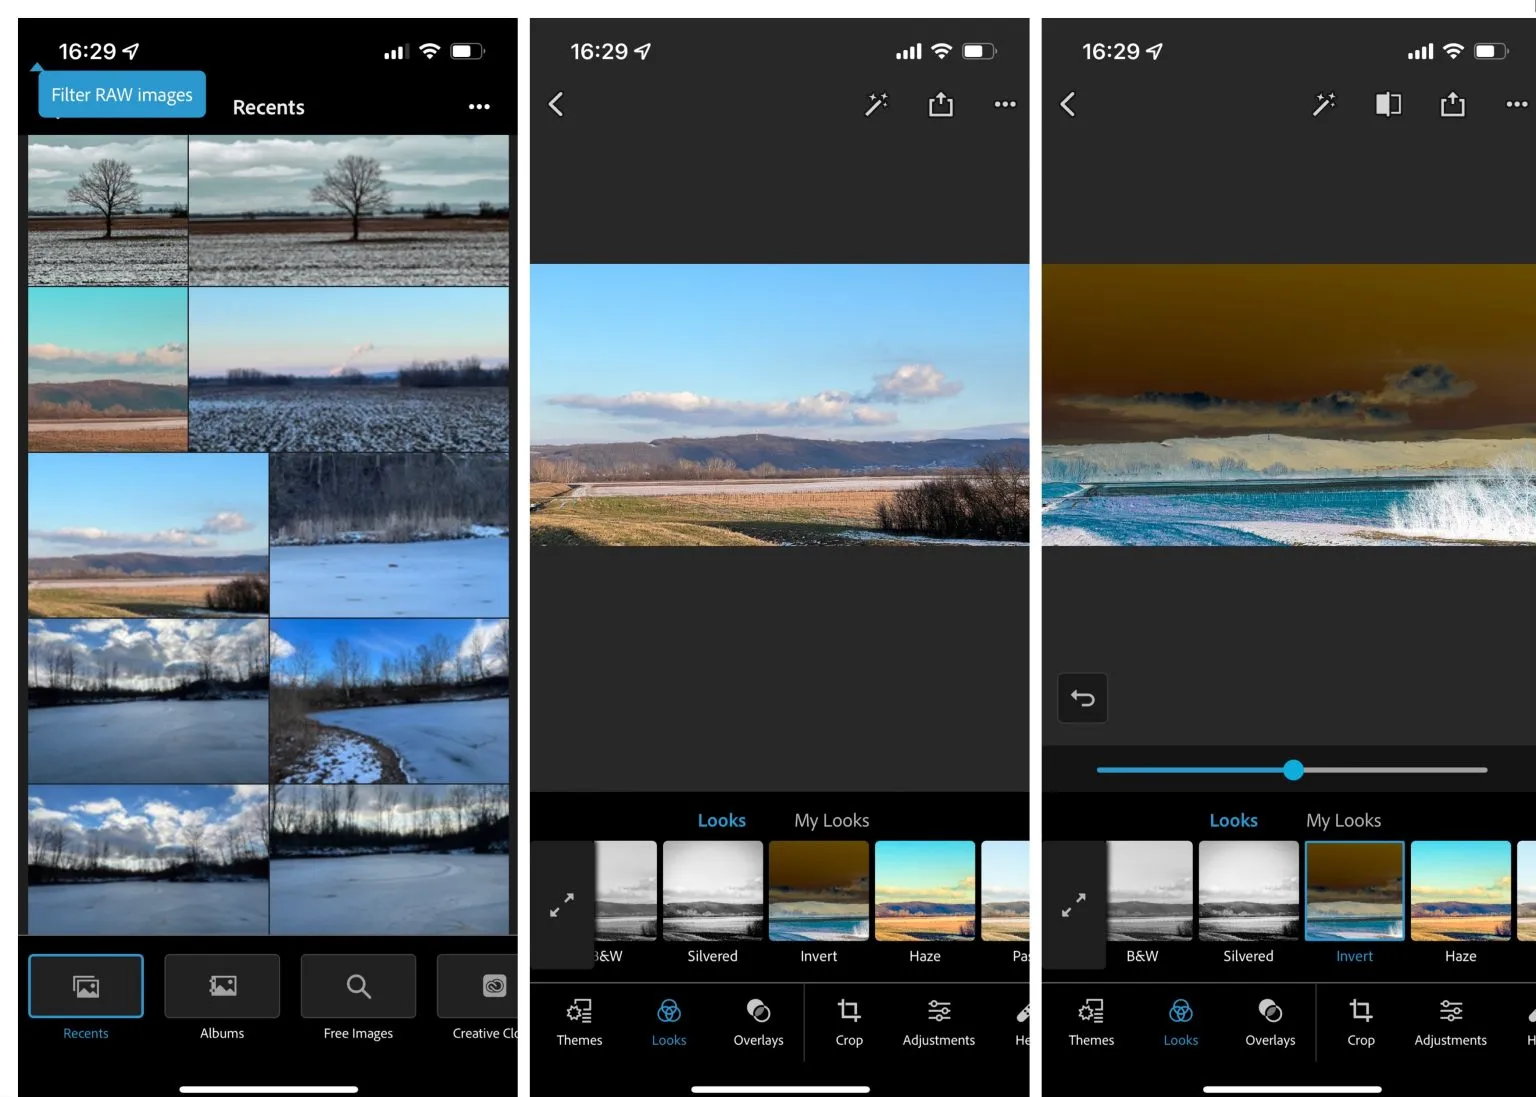
1) Photoshop Express :
Photoshop Express is a legit app which can help you invert colors in your photos in a few simple steps.
The process of inverting colors is
Step 1 : First, get “Photoshop Express”.
Step 2: Open “Photoshop Express” in step two.
Step 3 : Choose an image and tap “edit.”
Step 4 : Choose “Looks”
Step 5 : Select “Basic”
Step 6 : You will find an “Invert option” situated on the right side.
Tap on it.
This is the process of inverting colors.
As you can see, this is a very easy way to invert colors on the iPhone.
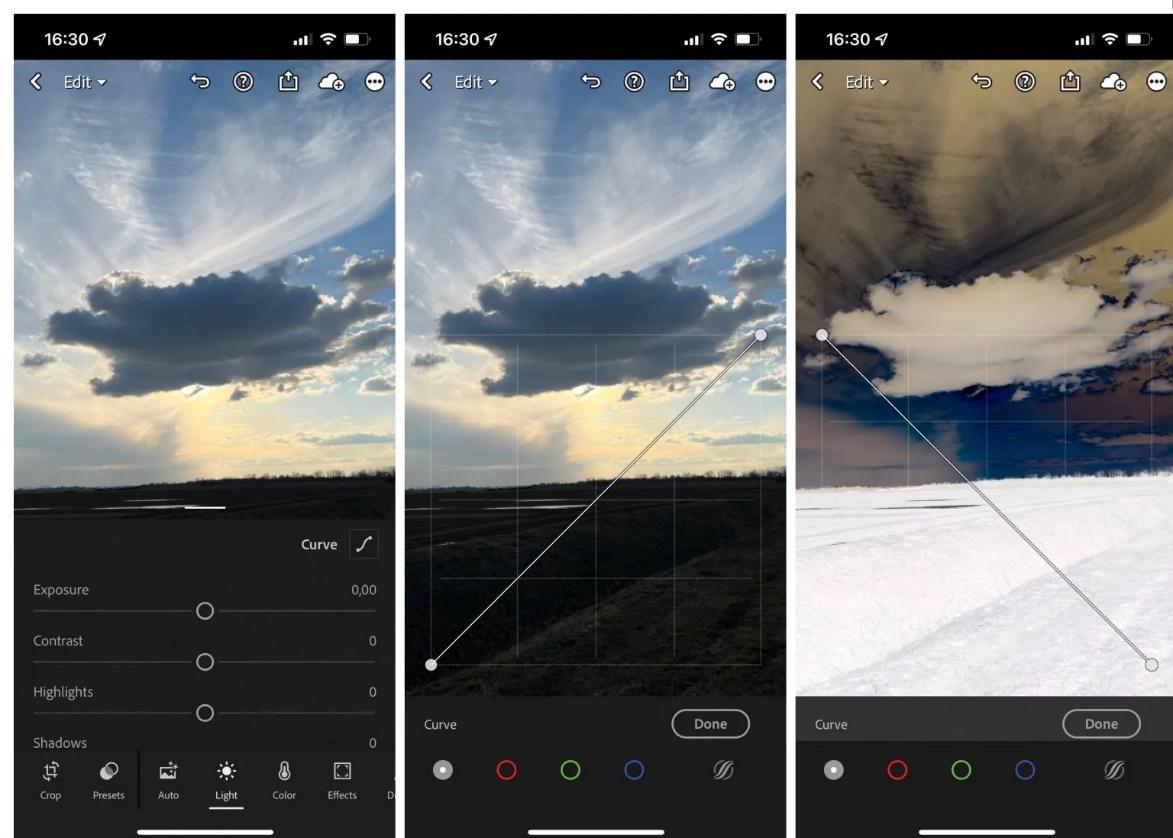
2) Lightroom :-
The second method is using Lightroom.
Photoshop Express can automatically invert colors on photos, but in Lightroom you will need to use the “curse slider” located at the bottom.
Lightroom allows you to invert photos as per your preference using the contrast slider.
Steps to invert colors using Lightroom :-
Step 1 : Download the “Lightroom” app.
Step 2 : Choose the picture.
Step 3 : Choose the “Light” button.
Step 4 : Choose “curve”.
We have already covered two methods for inverting colors for images on your iPhone.
How to invert photos on your iPhone ?
Step 1 : Go to “Photos”
Step 2 : Select a picture and tap “Edit”.
The “edit” icon is situated at the top right corner.
Step 3 : Tap the “Square “icon.
Step 4 : On the upper left corner, you will find a “right angle triangle shape” icon.
Tap the icon.


This is the process to invert a photo on an iPhone.
Conclusion :-
Now you have a clear idea as to how to invert photos on the iPhone. Inverting colors will aid in enhancing your pictures. Thereby, making your iPhone more accessible to those with visual impairment. Hence, go ahead and use inverse color on the iPhone to make your pictures better and more attractive.


